This tutorial is part two in a series that will show you how to create a virtual synthesizer using JavaScript and the Web Audio API. In part two, we’ll be adding an on-screen keyboard to the synthesizer. Click here to clone or download the working code examples from the GitHub repository. Click here to view the finished product that uses the concepts and code discussed in this series. To get a better idea of the complete process, checkout the overview.
This keyboard will listen for mousedown and mouseup events that will trigger notes via JavaScript. In a later tutorial, we will connect the computer keyboard to the synthesizer.
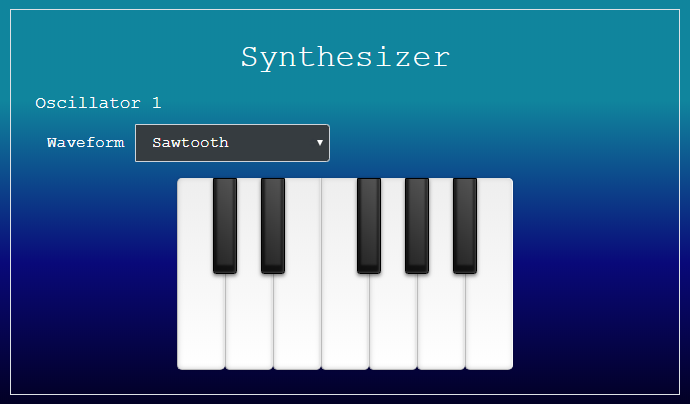
The On-screen Keyboard HTML
First, we’ll replace the Play/Stop button with the keyboard markup. It’s simply a <ul> containing all the keys as <li> elements. This keyboard was adapted from this Codepen example. This will give us a one octave keyboard.
<div class="keys">
    <ul>
        <li class="key white c" data-note="C"></li>
        <li class="key black cs" data-note="C#"></li>
        <li class="key white d" data-note="D"></li>
        <li class="key black ds" data-note="D#"></li>
        <li class="key white e" data-note="E"></li>
        <li class="key white f" data-note="F"></li>
        <li class="key black fs" data-note="F#"></li>
        <li class="key white g" data-note="G"></li>
        <li class="key black gs" data-note="G#"></li>
        <li class="key white a" data-note="A"></li>
        <li class="key black as" data-note="A#"></li>
        <li class="key white b" data-note="B"></li>
    </ul>
</div>
Synthesizer Styles
We will be using SASS to write all the styles because it’s more convenient than CSS. First, we’ll create a file called synth.scss. This will be the main SCSS file and will import any other style modules like the ‘keys’ module we’re about to create. Let’s first give the synth a litte color and make the labels a little easier on the eyes. Add this to synth.scss:
/* Variables */
$synth-white: #FFFFFF;
$synth-dk-grey: #363c40;

/* Imports */
@import "styles/keys.scss"; // Make sure you create this before trying to compile

/* Global Synth Styles */
.js-synth {
    margin: 0 auto;
    width: 100%;
    max-width: 800px;
    height: auto;
    background: linear-gradient(rgba(16, 133, 157, 1) 25%, rgba(9, 9, 121, 1) 65%, rgba(2, 0, 36, 1) 100%);
    padding: 10px;
    color: $synth-white;
    font-family: courier;
    .border {
        width: 100%;
        height: 100%;
        border: 1px solid grey;
        padding: .5rem;
    }
    .title {
        font-size: 2em;
    }
    .label {
        font-size: 1.1em;
        position: relative;
        z-index: 1;
    }
    .input-group {
        font-size: 1em;
        .input-group-text {
            color: inherit;
            background-color: transparent;
            border: none;
        }
        input {
            height: 2em;
            width: 3.5em;
            max-width: 3.5em;
            padding: 5px;
            text-align: center;
        }
    }
    .input-group select.custom-select {
        color: inherit;
        background-color: $synth-dk-grey;
        appearance: menulist; // Make sure caret still shows white
        -moz-appearance: menulist;
        -webkit-appearance: menulist;
    }
    p {
        margin-bottom: .5rem;
    }
}
On-screen Keyboard Styles
We need to give the keys size and shape as well as create ‘active’ styles for when they are being played (clicked). We also need to create the offsets for the black keys. we’re going to create a ‘styles’ folder in the part-2 directory and put all the keyboard styles in a file called keys.scss. As you can see above, we’ve already imported it in synth.scss.
.keys {
    ul {
        margin: 0 auto 1em;
        padding: 0 1.5em;
        position: relative;
        height: 15em;
        width: 31em;
        font-size: 12px;
    }
    li {
        margin: 0;
        padding: 0;
        list-style: none;
        position: relative;
        float: left
    }
    ul .white {
        height: 16em;
        width: 4em;
        z-index: 1;
        border-left: 1px solid #bbb;
        border-bottom: 1px solid #bbb;
        border-radius: 0 0 5px 5px;
        box-shadow: -1px 0 0 rgba(255, 255, 255, 0.8) inset, 0 0 5px #ccc inset, 0 0 3px rgba(0, 0, 0, 0.2);
        background: linear-gradient(to bottom, #eee 0%, #fff 100%)
    }
    ul .white.active {
        border-top: 1px solid #777;
        border-left: 1px solid #999;
        border-bottom: 1px solid #999;
        box-shadow: 2px 0 3px rgba(0, 0, 0, 0.1) inset, -5px 5px 20px rgba(0, 0, 0, 0.2) inset, 0 0 3px rgba(0, 0, 0, 0.2);
        background: linear-gradient(to bottom, #fff 0%, #e9e9e9 100%)
    }
    .black {
        height: 8em;
        width: 2em;
        margin: 0 0 0 -1em;
        z-index: 2;
        border: 1px solid #000;
        border-radius: 0 0 3px 3px;
        box-shadow: -1px -1px 2px rgba(255, 255, 255, 0.2) inset, 0 -5px 2px 3px rgba(0, 0, 0, 0.6) inset, 0 2px 4px rgba(0, 0, 0, 0.5);
        background: linear-gradient(45deg, #222 0%, #555 100%)
    }
    .black.active {
        box-shadow: -1px -1px 2px rgba(255, 255, 255, 0.2) inset, 0 -2px 2px 3px rgba(0, 0, 0, 0.6) inset, 0 1px 2px rgba(0, 0, 0, 0.5);
        background: linear-gradient(to right, #444 0%, #222 100%)
    }
    .a, .b, .g, .d, .e {
        margin: 0 0 0 -1em;
    }
    ul li:first-child {
        border-radius: 5px 0 5px 5px;
    }
    ul li:last-child {
        border-radius: 0 5px 5px 5px;
    }
}
If you don’t want to change the styles, you don’t need to worry about compiling the SCSS, because I’ve already committed the compiled CSS to the repository.
If you do want to change the styles, I’m using Node.js and Gulp to compile the SCSS here, but you can use whatever compiler you want. You need to have NPM installed, but the rest of dependencies are included in the package.json file in the repository. You just need to run npm install in the js-synthesizer directory (where the package.json file is).
npm installI’ve created two Gulp tasks to keep the CSS updated:
- [styles] – This task compiles all the SCSS in all parts folders to synth.css.
- [watch] – This task watches for changes to any SCSS files and starts the ‘styles’ task.
To run the styles or the watch task, navigate to the /js-synthesizer directory and type:
gulp stylesor:
gulp watchNow we need to add this new stylesheet synth.css to our HTML document.
<!-- Our Custom Styles -->
<link href="synth.css" rel="stylesheet">
Connect the Keyboard & Synthesizer with JavaScript
Now that we have a beautiful keyboard, we need to add the JavaScript to make it play notes.

Create a Frequency Map
First, inside synth.js we’re going to add an object that maps the note names from the keys to frequencies.
var hzs = {
    'C':  32.703195662574829,
    'C#':  34.647828872109012,
    'D':  36.708095989675945,
    'D#':  38.890872965260113,
    'E':  41.203444614108741,
    'F':  43.653528929125485,
    'F#':  46.249302838954299,
    'G':  48.999429497718661,
    'G#':  51.913087197493142,
    'A':  55.000000000000000,
    'A#':  58.270470189761239,
    'B':  61.735412657015513
};
The Voice Class
Second, we’re going to refactor the oscillator code from part one with an object oriented approach. This will allow us to reuse the code needed for playing sound each time the user strikes a key. We will create a new class called Voice. This Voice class is adapted from an example here. The Voice class constructor will create an OscillatorNode and initialize all it’s necessary properties. Each Voice object will also need a start() and stop() method to start and stop notes based on mousedown/keydown and mouseup/keyup events.
// Create AudioContext
var audioCtx = new(window.AudioContext || window.webkitAudioContext)();

var activeVoices = {};

class Voice {
    constructor(note) {
        // * 4 because if we only have one octave,
        // it should be high enough to sound decent. In a future
        // post, we will make use of a greater frequency range
        // by multiplying these 12 frequencies in the hzs object
        this.frequency = hzs[note] * 4;

        console.log('Note: ' + note);
        console.log('Frequency: ' + this.frequency);

        this.note = note;
        this.oscillator = audioCtx.createOscillator();
        this.oscillator.type = $('#waveType').val(); // Get waveform type from the dropdown box
    }

    start() {
        this.oscillator.frequency.setValueAtTime(this.frequency, audioCtx.currentTime); // value in hertz
        this.oscillator.connect(audioCtx.destination); // connect oscillator to output

        this.oscillator.start();
    }

    stop() {
        this.oscillator.stop();
    }
}
Add EventListeners
This on-screen keyboard will function by the user clicking on the keys with their mouse. In a later post, we will add the ability to use the computer keyboard to play notes as well.
We need to add EventListers to listen for the mousedown events to start notes and mouseup events to stop notes.
// Add EventListeners
$('.key').on('mousedown', function() { // When user clicks a key

    var kbNote = $(this).attr('data-note'); // The name of the note

    // Strip numbers. Right now it could look like this: 2F#
    var rawNote = kbNote.replace(/[0-9]/g, '');

    var voice = new Voice(rawNote);

    activeVoices[rawNote] = voice; // Add the voice to the activeVoices object
    voice.start();

    $(this).addClass('active');
});

// Stopping all keys whenever there is a mouseup event
// anywhere on the page
$('body').on('mouseup', function(e) {
    const keys = Object.keys(activeVoices);

    for (const key of keys) {
        // console.log('key : ' + key);
        activeVoices[key].stop();
        delete activeVoices[key];
    }

    $('.key').removeClass('active');
});
You’ll notice two interesting things with the above code:
- The mouseup event is attached to the entire body element. That’s because we want the notes to stop whenever a mouseup event happens – even if the user’s mouse slides off the keyboard or onto another key.
- Each Voice object get’s added to the activeVoices object. This is how we keep track of which notes are playing. Right now, it’s fairly simple because the user can only click one note at a time. However, when we connect the computer keyboard, we’ll be giving the user the ability to play multiple notes simultaneously.
To stop a Voice from sounding, we first look it up by it’s note name in the activeVoices object. Then we call it’s stop() method and delete the Voice from the activeVoices object.
That’s it! Now it’s actually starting to look and sound like a synthesizer. In the next post we’ll be turning this keyboard into a two octave keyboard that can play in six different octaves.