
This tutorial is part one in a series that will show you how to create a virtual synthesizer using JavaScript and the Web Audio API. Click here to clone or download the working code examples from the GitHub repository. Click here to view the finished product that uses the concepts and code discussed in this series. To get a better idea of the complete process, checkout the overview.
The HTML
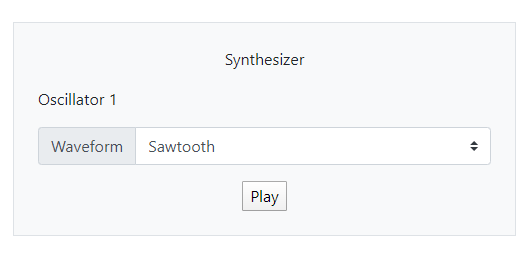
This HTML will create a box with a Waveform select element and a Play/Stop button. It includes all the CSS and JS dependencies. At the bottom is the link to the custom JavaScript we will add – synth.js.
<!DOCTYPE html>
<html>
<head>
    <title>JS Synthesizer</title>
</head>
<body>

    <!-- HTML -->
    <div class="container">
        <div class="js-synth bg-light mt-4">
            <div id="border" class="border p-4">
                <div class="row">
                    <div class="col-12 text-center">
                        <p class="title">Synthesizer</p>
                    </div>
                </div>
                <div class="row">
                    <div class="col-sm">
                        <div class="section">
                            <p class="label">Oscillator 1</p>
                            <div class="input-group mb-3">
                              <div class="input-group-prepend">
                                <label class="input-group-text" for="waveType">Waveform</label>
                              </div>
                              <select class="custom-select" id="waveType">
                                <option value="sine">Sine</option>
                                <option value="square">Square</option>
                                <option value="sawtooth" selected>Sawtooth</option>
 <option value="triangle" selected>Triangle</option>
                              </select>
                            </div>
                        </div>
                    </div>
                </div>
                <div class="row">
                    <div class="col-12 text-center">
                        <button id="playBtn">Play</button>
                        <button id="stopBtn" style="display: none;">Stop</button>
                    </div>
                </div>
            </div>
        </div>
    </div>


    <!-- Styles -->
    <link href="https://stackpath.bootstrapcdn.com/bootstrap/4.4.1/css/bootstrap.min.css" rel="stylesheet" integrity="sha384-Vkoo8x4CGsO3+Hhxv8T/Q5PaXtkKtu6ug5TOeNV6gBiFeWPGFN9MuhOf23Q9Ifjh" crossorigin="anonymous">


    <!-- JS Libraries -->
    <script
      src="https://code.jquery.com/jquery-3.4.1.min.js"
      integrity="sha256-CSXorXvZcTkaix6Yvo6HppcZGetbYMGWSFlBw8HfCJo="
      crossorigin="anonymous">
    </script>

    <script src="https://stackpath.bootstrapcdn.com/bootstrap/4.4.1/js/bootstrap.min.js"
        integrity="sha384-wfSDF2E50Y2D1uUdj0O3uMBJnjuUD4Ih7YwaYd1iqfktj0Uod8GCExl3Og8ifwB6"
        crossorigin="anonymous">
    </script>

    <!-- Our custom JavaScript -->
    <script type="text/javascript" src="synth.js"></script>

</body>
</html>
Synth.js and How it Works
Now we need to create synth.js. This file will initialize the synthesizer and the UI.
(function($) {

    // create web audio api context
    var audioCtx = new(window.AudioContext || window.webkitAudioContext)();

    var oscillator; // Declare here in context where all event listeners have access

    // Controls
    $('#playBtn').click(function() {
        // Create oscillator
        oscillator = audioCtx.createOscillator();

        // Connect the oscillator node to the audio context destination which is the output
        oscillator.connect(audioCtx.destination);

        // Set frequency
        oscillator.frequency.setValueAtTime(440, audioCtx.currentTime);

        // Set wave form type from select - default is Sine
        var waveType = $('#waveType').val();
        oscillator.type = waveType;

        // Start oscillator
        oscillator.start();

        // Show/hide buttons
        $('#playBtn').hide();
        $('#stopBtn').show();
    });

    $('#stopBtn').click(function() {
        // Stop the oscillator
        oscillator.stop();

        // Show/hide buttons
        $('#stopBtn').hide();
        $('#playBtn').show();
    });

})(jQuery);
The Web Audio API works by creating and connecting nodes. Because nodes are created from an AudioContext, the first step is to create the AudioContext.
To create sound, we need an OscillatorNode. That is the source of the sound. To play sound, the last node in the chain needs to be connect to AudioContext.destination. In this case, the only node is the OscillatorNode so we connect it to AudioContext.destination.
Finally, we add EventListeners to allow the user to start and stop the sound with the play/stop buttons. There is also a dropdown for the user to choose the waveform type. The options in this dropdown are the default options provided by the oscillator node.
It should look like this – pretty basic.
In the next part, we’ll add a keyboard and give the synthesizer the ability to play different notes from the keyboard.